These instructions will cover how to configure Prepar3D, and where to get calculated Real World information from the SimVisuals 2 interface.
This article is also available as a video here: Configuring Prepar3D for Multi-Camera/Frustum Video
Note: We will be using a spanned desktop (Nvidia Surround/Mosaic or AMD Eyefinity) on a single PC in this tutorial.
First place SimVisuals into 2D mode if not already. This will make it far easier to work with the menus. Open a Prepar3d scenario that you would like to use on the simulator screen.
Setting up the Windows
Press the ALT key on the keyboard to bring up the menu, then click Views > Panel Only View. This will close the current view. Click Views > New View > Cockpit > CockpitDo this three times to open three windows (Open as many windows as you have projectors)
Arrange the windows side by side, and stretch them to take up 1/3 of the screen each

Setting up the Cameras
Right-click in the centre window, then click Manage Cameras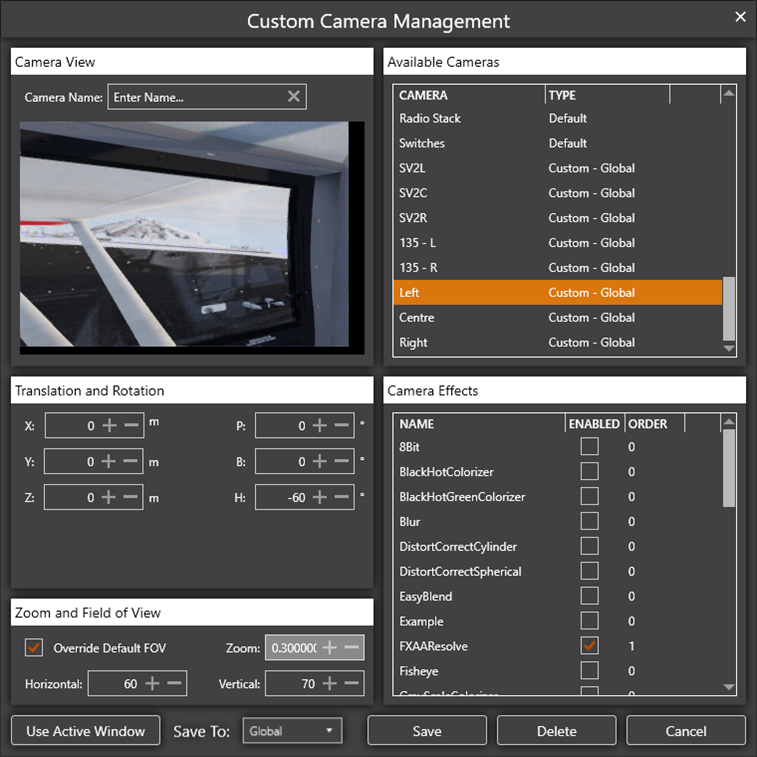
Enter a Camera Name eg. Left Open SimVisuals and Click Configure > Real-World
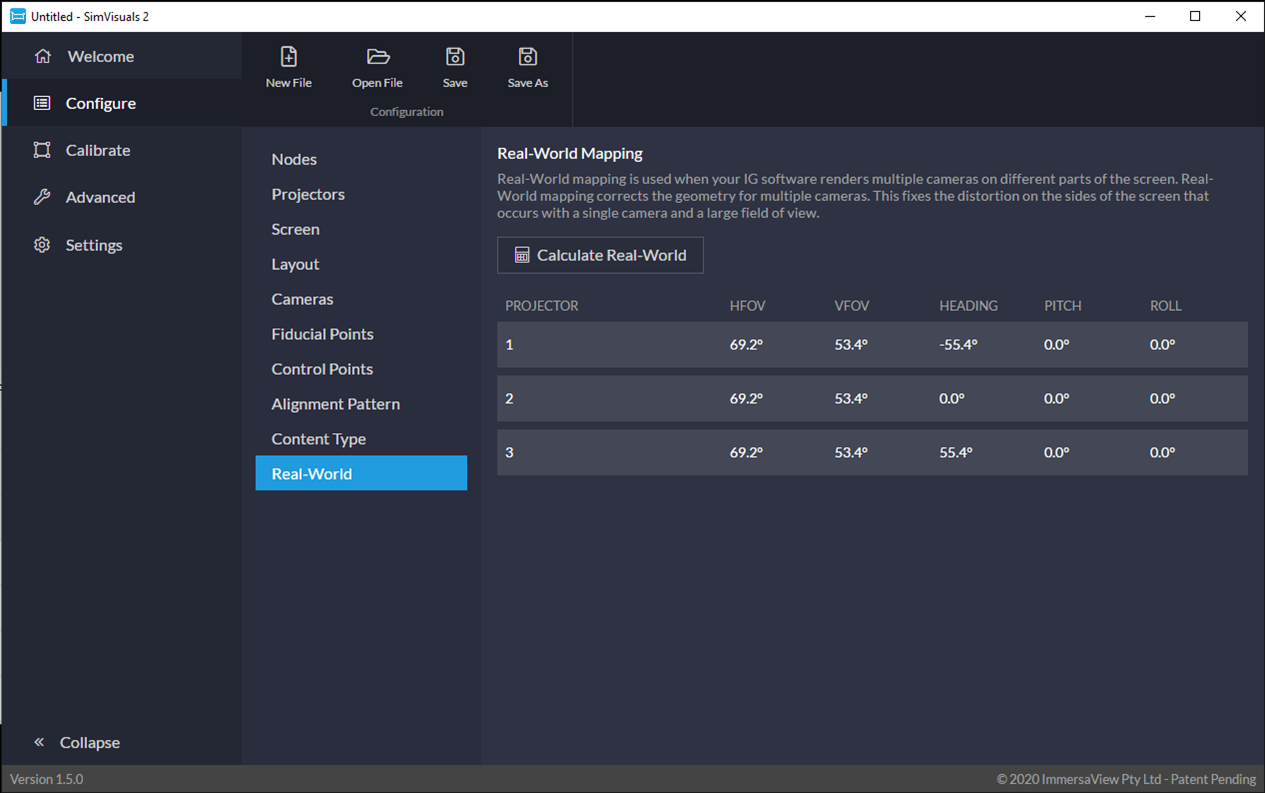
Note down the FOV, and Heading, Pitch, Roll (Bank) information of each of the cameras.
Switch back to Prepar3d, ensure Override Default FOV is checked, then enter the FOV, and Heading, Pitch, Bank (Roll) details from SimVisuals.
Click Save.
Repeat for the remaining cameras by changing the Camera Name for the second camera, and adjust the necessary details, in a grid setup, you may only need to change one value. In our case, only the heading is changing.
Once you have entered the details and saved each of the cameras, click Cancel.
Assigning the Cameras to your Windows
Then Right-click on each window, click Cockpit then the name of your camera.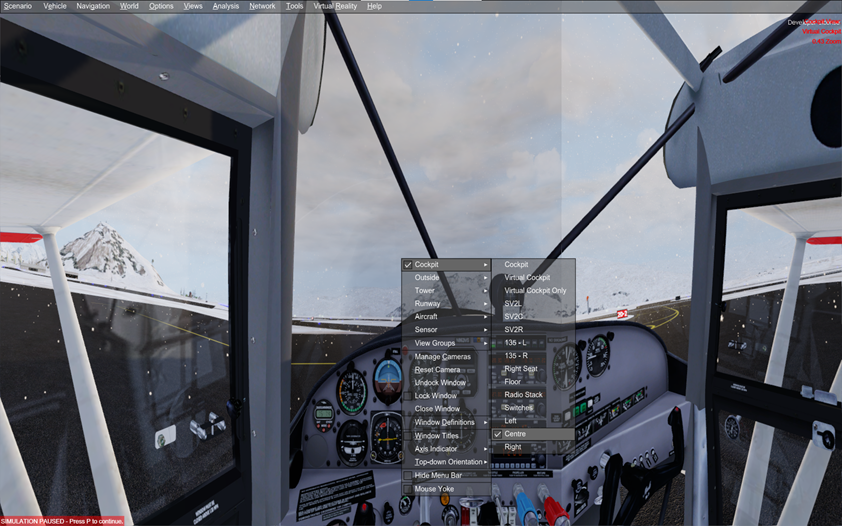
Now we will save the scenario, click Scenario > Save, then enter a Name then click OK.
Quit Prepar3d by pressing ESC on the keyboard, and clicking Exit Prepar3d
Disabling Dynamic Head Movement
Next, we need to disable Dynamic Head Movement, which visualises head moments during acceleration pitch and banking manoeuvres, this will cause the multicamera setup to move independently, and the overlaps will not blend during this motion.Open the following configuration file
C:\Users\[username]\AppData\Roaming\Lockheed Martin\Prepar3D v5\Prepar3D.cfg
Replace [username] with the current user name logged in on the PC.
Find the following lines and change them to match the below.
[DynamicHeadMovement]
LonAccelOnHeadLon=-0.000000
LonAccelOnHeadPitch=-0.000000
RollAccelOnHeadLat=0.000000
YawAccelOnHeadLat=-0.000000
RollAccelOnHeadRoll=0.000000
MaxHeadAngle=5.000000
MaxHeadOffset=0.300000
HeadMoveTimeConstant=1.000000
Testing
Put SimVisuals into 3D mode by clicking Configure > Content-Type, Select 3D Simulation from the dropdown.Click Calibrate > Pattern Then press Escape on the keyboard, then press Apply.
Open up Prepar3D and load your saved scenario.
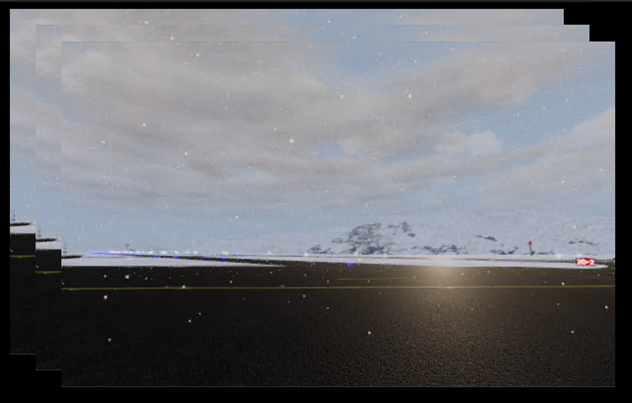
Enjoy the blended multi-frustum display!
Download Resource