This White Paper will guide you through the setup of EyeFinity with multiple projectors on your AMD graphics card so you are ready to use ImmersaView Blend, ImmersaView Warp or SimVisuals products.
AMD EyeFinity lets you group monitors or projectors to form a single spanned display. A single Windows Desktop can then been seen across the entire display so applications can be run in full-screen mode across multiple displays. AMD EyeFinity is able to set up from 2 to 6 projectors in a number of configurations.
This White Paper will guide you through the setup of EyeFinity with multiple projectors on your AMD graphics card so you are ready to use Blend, Warp and SimVisuals.
Graphics Card
EyeFinity is an AMD technology that is available on a number of consumer and workstation graphics card. AMD graphics cards that support EyeFinity include the Radeon HD 5000 series and up, and the FirePro V series.
Connections
Different manufacturers implement different connections on their graphic cards. Although a card maybe the same model number, the outputs connectors could vary between manufacturers. We recommend checking outputs of graphics cards prior to purchase to ensure these meet your requirements.
Most consumer cards (at the time of writing) have 2 DVI, one HDMI and one DisplayPort connector, which enables them to drive 3 displays at once. Other cards have 2 DVI, one HDMI and 2 Mini-DisplayPort connectors which allows up to 4 displays to be used. Some cards will support EyeFinity with 4, 5 or 6 Mini DisplayPort connectors, which allows up to 6 displays to be used at once.
To use more than 2 projectors off a single graphics card, you need to connect the additional projectors through the card’s DisplayPort connectors, using active adapters. The active adapter is very important. Using passive adapters will result in the projectors being seen in the list of available displays but unable to display signals at higher resolutions.
A list of compatible adapters is available here: http://support.amd.com/us/eyefinity/Pages/eyefinity-dongles.aspx
Tip: for best results, it is recommended to connect all the projectors from DisplayPort connections where possible. This way all displays will run off the same internal clock on the graphics card.
Software
EyeFinity requires at least Windows Vista, Windows 7 or Windows 8. Windows XP is not supported.
We recommend using the latest AMD drivers for your card which can be downloaded at http://support.amd.com/us/gpudownload/Pages/index.aspx
Setting Up
To set up EyeFinity, right click on the Windows desktop and select “Catalyst Control Center”. In the Catalyst Control Center, expand the “AMD EyeFinity Multi-display” tab on the left. Select “Create EyeFinity Display Group”.
Step 1
With two or more projectors or monitors connected right click on the desktop and open AMD Catalyst control center.

Step 2
Select “AMD Eyefinity Multi-Display” from the left hand menu.

Step 3
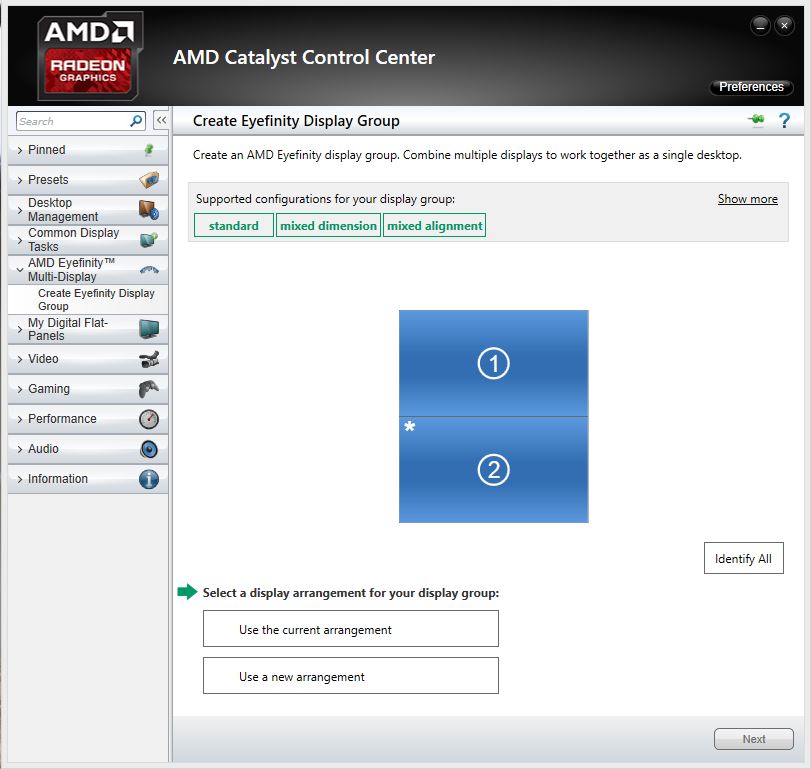
Select “Create Eyefinity Display Group”. You will now be presented with a screen showing the displays currently connected to your system. To assist with identifying where each panel is located, select “Identify all” and a number will appear on each screen that corresponds to the arrangement.
Step 4
Select to either “Use the current arrangement” if you are happy with how the screens are arranged, or “Use new arrangement” if you would like to rearrange the display positions. Once chosen, select next to continue.
Step 5
Your Eyefinity display group is now set up and you can now label and save for future use.

Rearranging your display group
If you are unhappy with the arrangement of the panels or projectors in your display group you can rearrange them.
Step 1
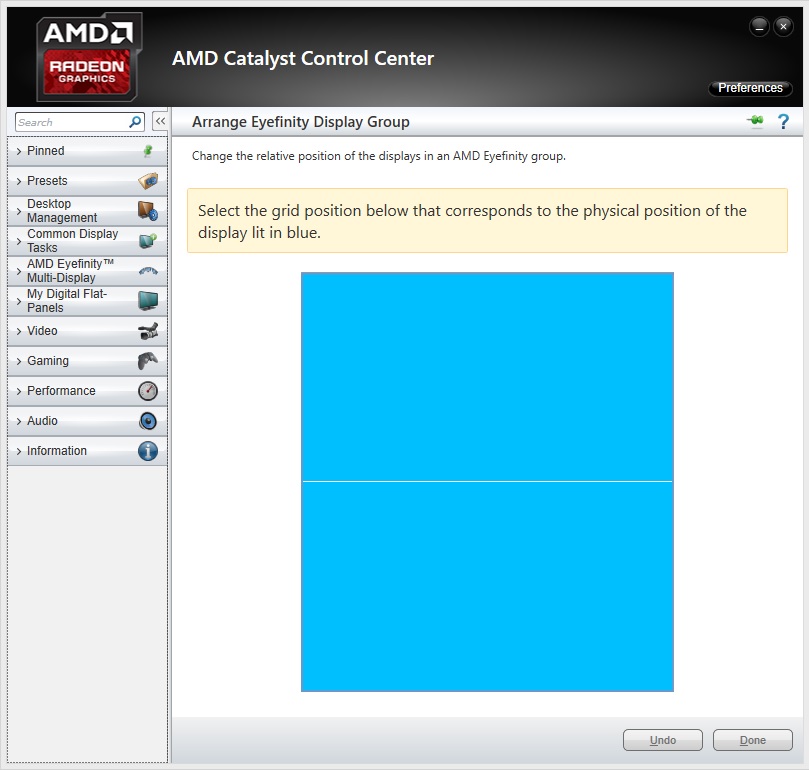
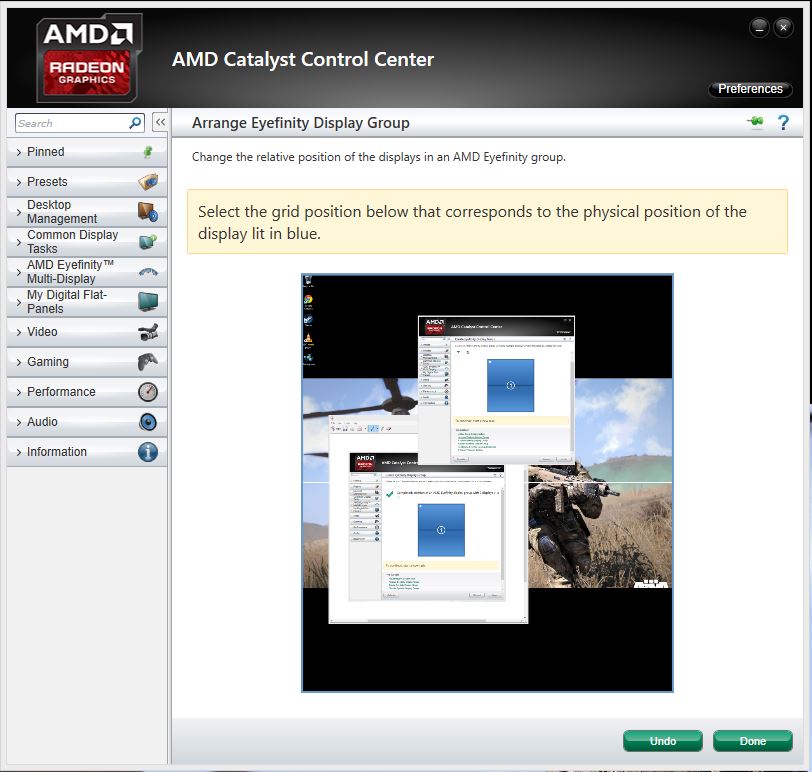
Select your display group and choose the menu option “Arrange Eyefinity Display Group”.
Step 2
Select the grid position that corresponds to the physical position of the display or projector highlighted in blue. Do this for each panel that is connected.
Step 3
Your display group should now be arranged as you have chosen and you can select ‘done’ to save.

Download Resource