Introduction
Nvidia Geforce GTX and RTX graphics cards allow you to use a feature called Surround to group multiple graphics card outputs into one seamless spanned display. Nvidia Quadro cards call this feature Mosaic which has slightly different benefits and use cases.Nvidia Surround
When using Nvidia Geforce graphics cards, you will need to set up Nvidia Surround to use desktop applications with SimVisuals 2.Right-click on the desktop and click NVIDIA Control Panel, otherwise, open the start menu and search for NVIDIA Control Panel.
Under 3D Settings, click Configure Surround, PhysX
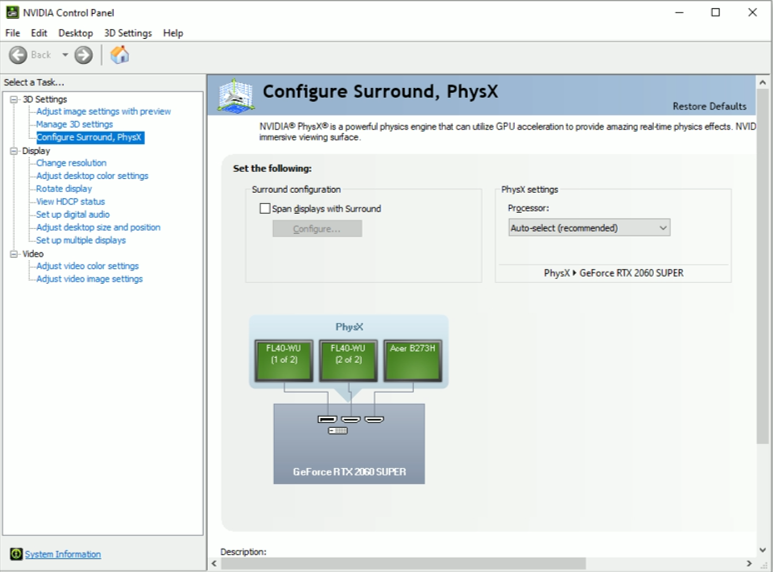
Figure.1. Nvidia Control Panel – Geforce Graphics Card
Click the checkbox Span Displays with Surround, then click Configure.
Note: There may be some apps that Nvidia Control Panel requires you to close before proceeding, once you have closed the apps, click Continue.
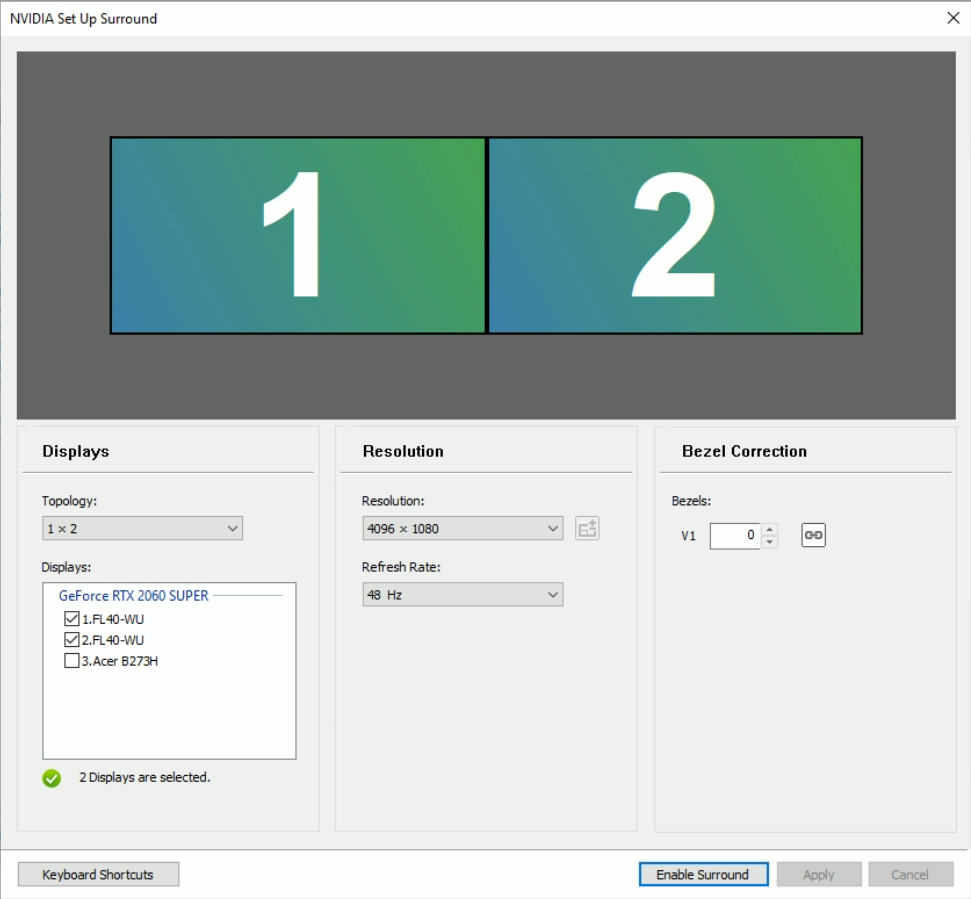
Figure.2. Nvidia Surround Configuration
Select the Topology that your projectors are laid out in, this is represented by rows and columns. In our example, we have two projectors side-by-side, 1 row with 2 columns, 1 x 2.
Next, select the checkboxes next to the displays/projectors that form a part of your overall system. In the resolution section, attempt to select a multiple of your projector’s native resolution. In our example, the projectors are 1920×1200, we have 2 columns, the native resolution is 3840×1200.
Drag the displays so the numbering matches the identifiers shown across each projector.
Click Enable Surround.
Note: In some cases, Nvidia Surround will select a default resolution which may not be native for your projectors and you may not have any other options in the dropdown box, we can resolve this issue in the following step.
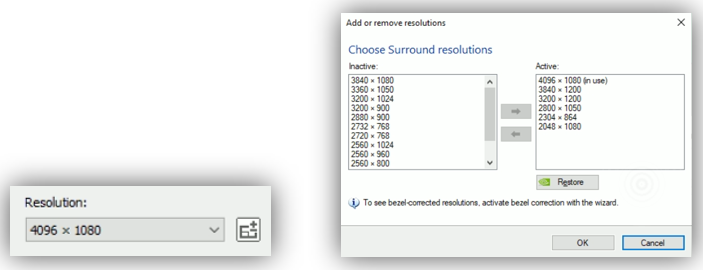
Figure.3. Nvidia Surround Resolution Selection
Now that surround is enabled, there should be more options in the dropdown box, if not, click the +/- button next to the dropdown. Select your projector’s native resolution multiple, and use the right arrow button to add it to the Active list.
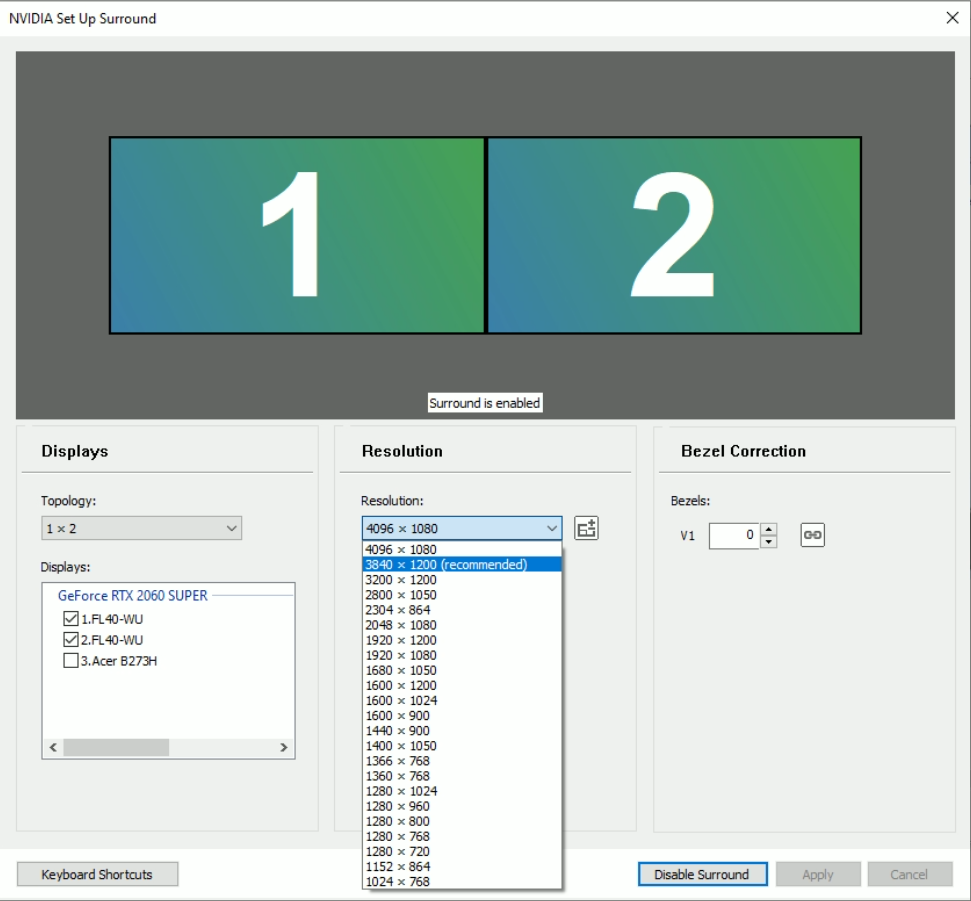
Figure.4. Nvidia Surround Native Projector Resolution
You should now be able to select the native resolution for your projectors, then press Apply.
Tip: If the apply button is off the screen and you can’t reach it, press Alt + A on the keyboard.
Maximising windows across the entire display
By default, when you press the maximise button on any window with Surround enabled, it will only maximise to the size of one projector.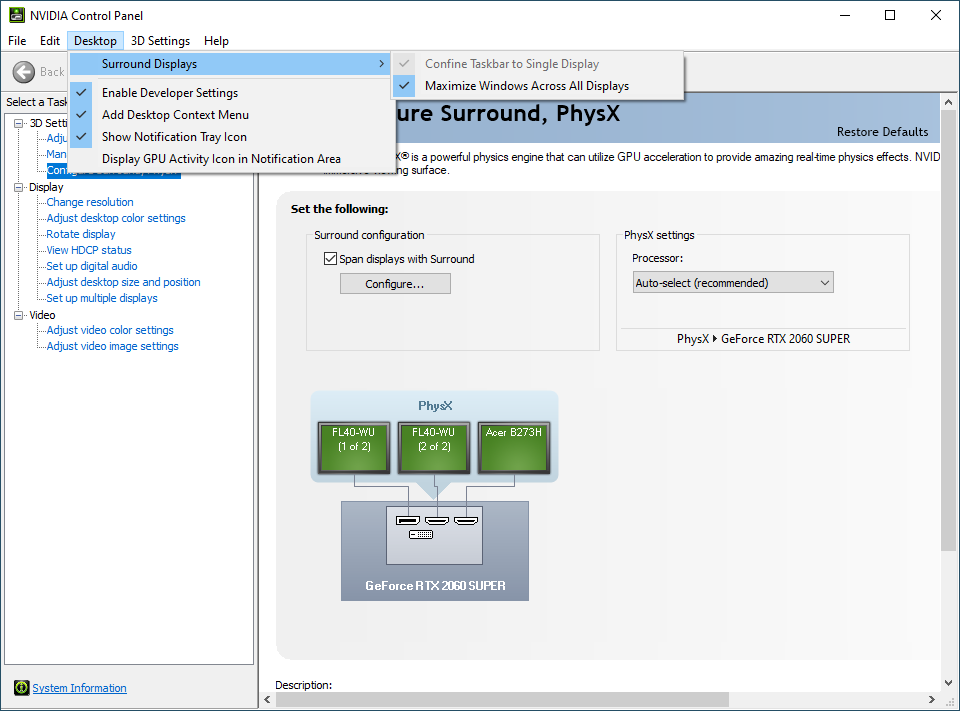
Figure.5. Nvidia Surround Maximising Windows Configuration
To have windows maximise to the full size of your screen, Click Desktop > Surround Displays > Maximise Windows Across All Displays
Nvidia Mosaic
When using Nvidia Quadro graphics cards, you will need to set up Nvidia Mosaic to use desktop applications with SimVisuals 2.Right-click on the desktop and click NVIDIA Control Panel, otherwise, open the start menu and search for NVIDIA Control Panel.
Under Workstation, click on Set up Mosaic
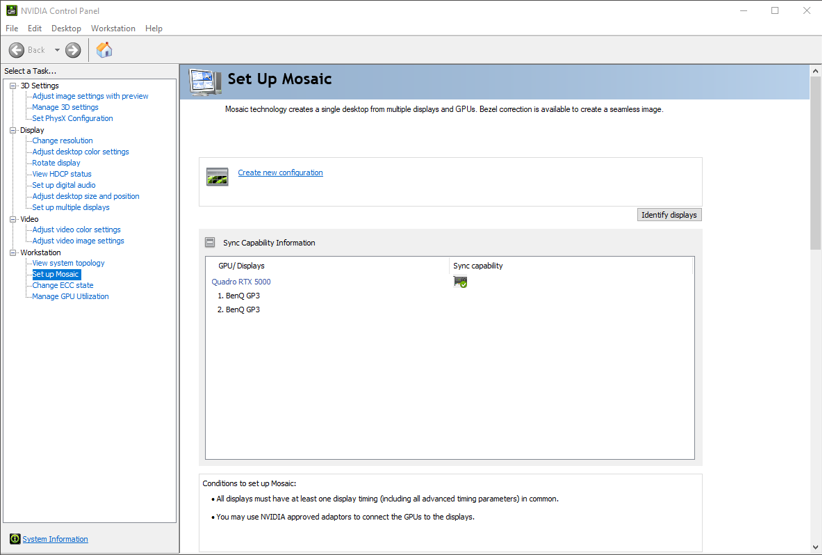
Figure.6. Nvidia Control Panel – Geforce Graphics Card
Click Create new configuration
Note: There may be some apps that Nvidia Control Panel requires you to close before proceeding, once you have closed the apps, click Continue.
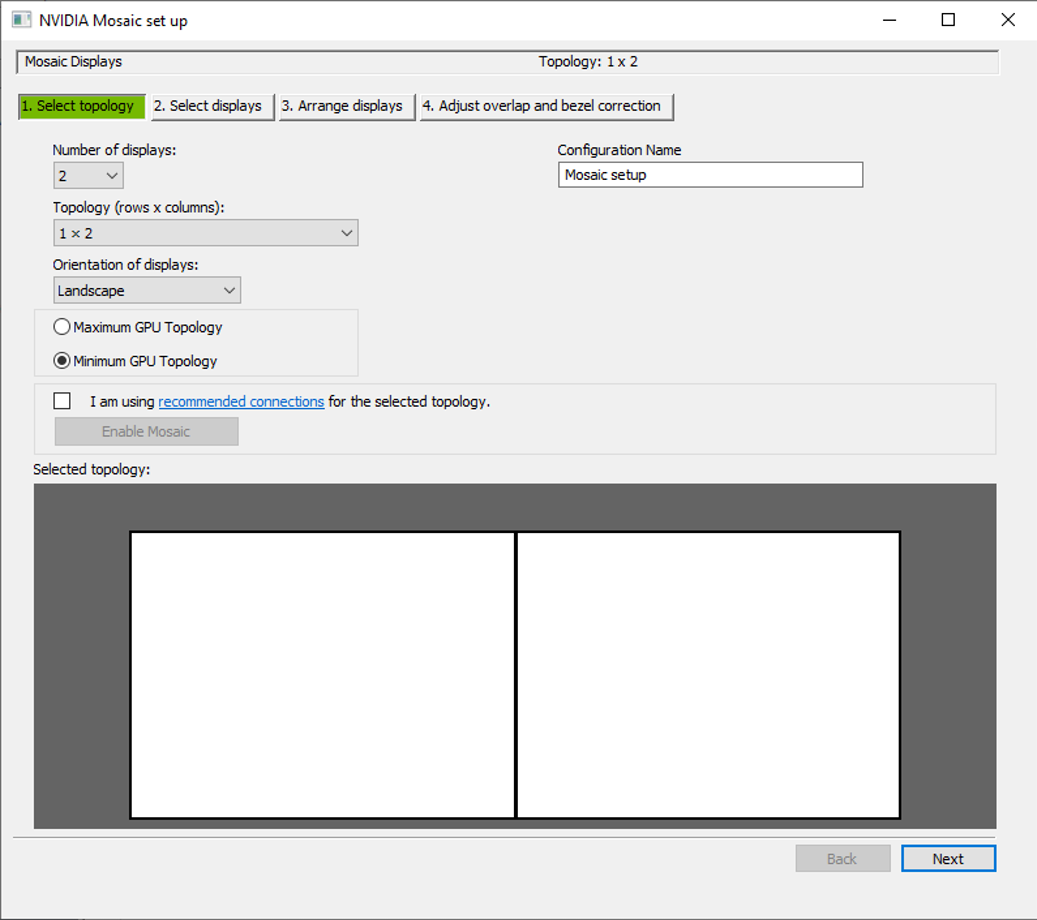
Figure.7. Nvidia Mosaic Topology
Select the Topology that your projectors are laid out in, this is represented by rows and columns. In our example, we have two projectors side-by-side, 1 row with 2 columns, 1 x 2. Then press Next
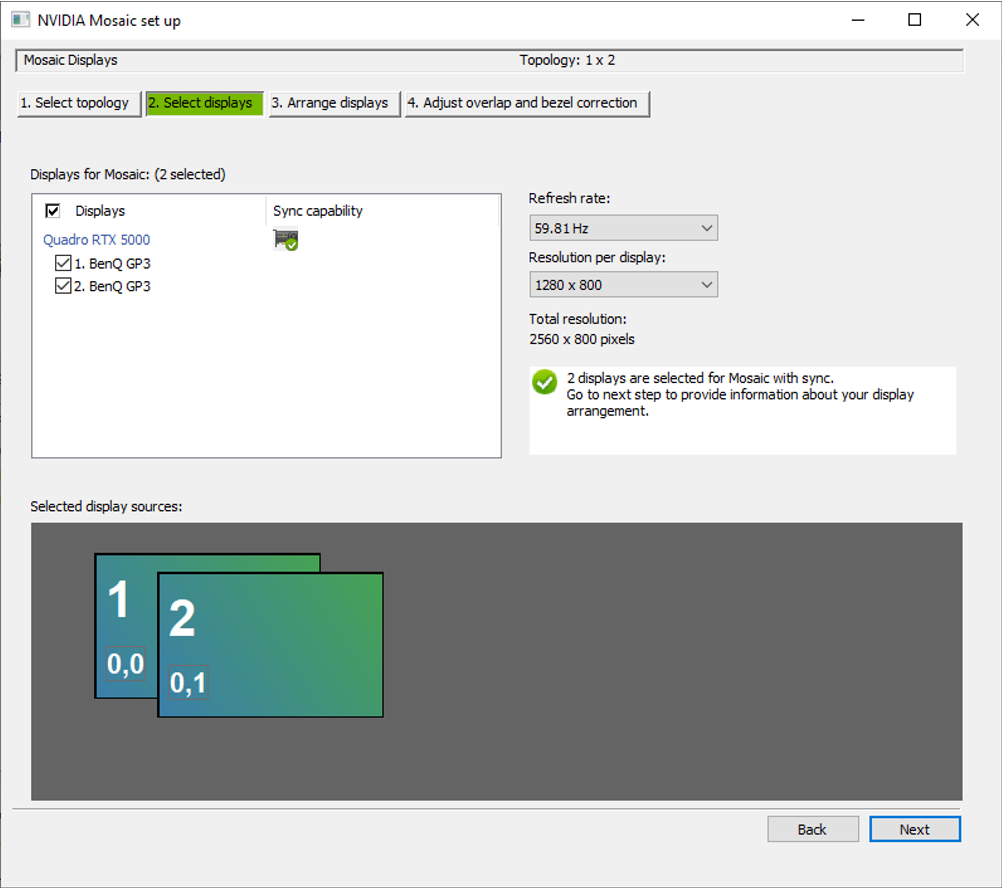
Figure.8. Nvidia Mosaic Display Selection
Next, select the checkboxes next to the displays/projectors that form a part of your overall system. In the resolution section, select the projector’s native resolution. Then click Next
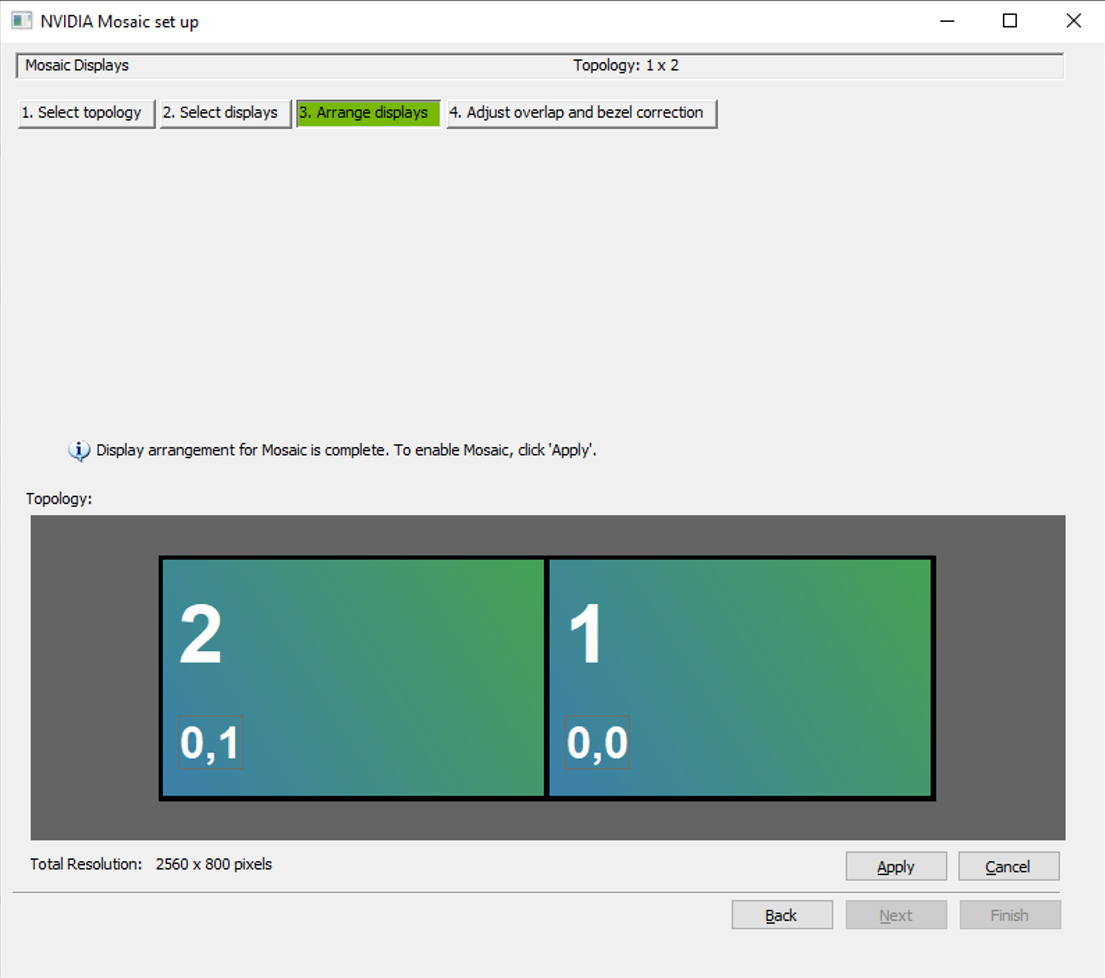
Figure.9. Nvidia Mosaic Display Arrangement
Drag the displays so the numbering matches the identifiers shown across each projector, then click Apply
Once you have confirmed that the settings have applied correctly, click Finish, then close Nvidia Control Panel.
Download Resource